The Beginner’s Guide to Painting Kitchen Cabinets Like a Pro
8 min read


Introduction to Kitchen Cabinet Painting
Painting kitchen cabinets is an increasingly popular home improvement project that offers both aesthetic enhancement and budget-friendly alternatives to complete renovations. Many homeowners seek to revitalize their kitchens without the prohibitive costs and extensive timelines associated with cabinet replacements. A fresh coat of paint can dramatically transform the appearance of cabinetry, allowing individuals to enjoy a more updated and modern space without the need for a significant financial investment.
The benefits of painting kitchen cabinets are both practical and visually appealing. Firstly, it provides an opportunity to customize the color scheme of the kitchen, aligning it with a homeowner’s personal style. This customization can significantly enhance the overall ambiance of the space, creating a welcoming environment for family and guests. Moreover, painting cabinets can help in increasing the value of a home, as prospective buyers often appreciate well-maintained, visually appealing kitchens.
From a cost perspective, undertaking a DIY cabinet painting project can be remarkably economical. The materials required—such as paint, brushes, and primer—are relatively inexpensive compared to the costs associated with hiring professionals or purchasing new cabinets. Additionally, engaging in this project allows for greater flexibility in terms of design and implementation, as individuals can work at their own pace. However, to achieve a professional-looking finish, preparation and planning are crucial. This involves selecting the right paint, thoroughly cleaning and sanding the surfaces, and ensuring that appropriate primer is used.
In summary, painting kitchen cabinets can serve as a transformative home improvement strategy that not only refreshes the look of a kitchen but also provides cost-saving benefits. As one embarks on this project, understanding the importance of preparation will be vital to achieving a successful outcome.
Gathering Your Supplies: Tools and Materials Needed
To successfully paint kitchen cabinets, gathering the right supplies is essential. This comprehensive list will ensure you are well-prepared to tackle the project with the tools and materials that deliver optimal results.
First, consider the paint. It is advisable to choose a high-quality cabinet paint that offers durability and easy cleaning. Look for 100% acrylic latex paint, which is resistant to chipping and fading. Brands such as Benjamin Moore Advance and Sherwin-Williams ProClassic are commonly recommended for their excellent coverage and finish.
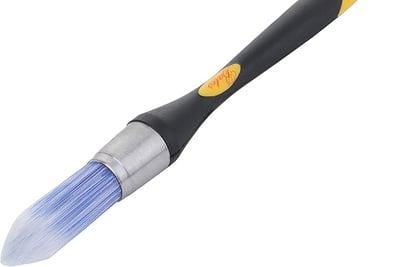
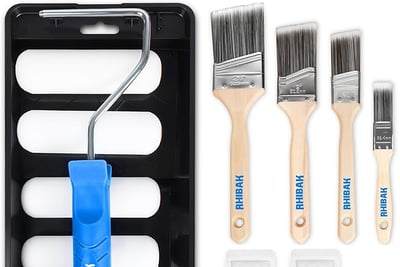
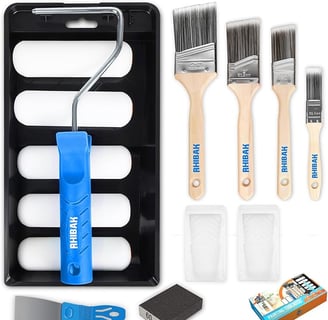
Next, you will need a primer. Primer plays a key role in ensuring that your paint adheres effectively to the cabinet surface, especially if you are applying it over a darker color or a previously stained finish. A stain-blocking primer can be particularly useful. Zinsser B-I-N and KILZ Premium are popular options in this category. Additionally, a selection of brushes and rollers will be necessary; a high-quality angled brush is ideal for reaching into corners, while a foam roller can provide a smooth finish on flat surfaces.
Painter's tape is critical for protecting areas you don’t want to be painted, such as walls and countertops. Choose a low-tack painter's tape that peels off cleanly, preventing damage to underlying surfaces. Sandpaper in various grits is also essential for preparing the cabinets before the application of primer and paint. Using medium grit (around 120) followed by fine grit (around 220) will create a smooth surface for the best paint application.
Lastly, prioritize safety equipment, including gloves, masks, and goggles, to protect yourself from fumes and dust. Ensuring you have adequate ventilation in your workspace is also crucial for a safe and successful cabinet painting project.
Preparing Your Kitchen and Cabinets for Painting
Before embarking on the project of painting your kitchen cabinets, proper preparation is essential to ensure a high-quality finish and lasting results. The first step is to clear out your kitchen entirely. Remove all items from cabinets, drawers, and countertops. This not only provides a clean slate for your painting project but also protects your belongings from any dust and debris that may accumulate during the process.
Next, take the time to remove cabinet doors and hardware, including knobs, handles, and hinges. It is advisable to label each door and its corresponding hardware to ensure easy reinstallation after the painting is completed. This step will allow for easier access to each surface and contribute significantly to achieving a smooth paint application.
Once the cabinets are emptied and doors removed, the surfaces require thorough cleaning. Use a degreaser or a solution of warm water and mild soap to eliminate any grime or grease. A clean surface is paramount for paint adhesion, so ensure that all surfaces are scrubbed clean and left to dry completely before proceeding further.
Sanding is another crucial step in the preparation process. Lightly sand the cabinet surfaces using fine-grit sandpaper to create a texture that helps the new paint adhere better. For wooden cabinets, this is particularly important to avoid peeling or chipping in the future. After sanding, ensure to wipe away any dust with a damp cloth to prepare the surface for priming and painting.
Additionally, it is important to protect your countertops and floors while working on your cabinets. Use drop cloths or plastic sheeting to cover these areas, preventing any accidental drips or spills from causing damage. Creating a clean, safe workspace is the foundation for a successful cabinet painting project, setting the stage for a professional-looking finish.
Choosing the Right Paint for Your Cabinets
When it comes to painting kitchen cabinets, selecting the right paint is crucial for achieving a professional finish that stands the test of time. Two primary types of paint are commonly used for cabinetry: oil-based and water-based paints. Each has its advantages and disadvantages that should be considered before making a final decision.
Oil-based paints are renowned for their durability and smooth finish. They tend to adhere better to surfaces, offering a hard, long-lasting finish that is resistant to scratches and stains. However, they have a longer drying time and emit strong fumes, necessitating good ventilation during application. Conversely, water-based paints dry quickly and are easier to clean up with soap and water. They are available in low-VOC and zero-VOC options, making them a safer choice for indoor use. While they may not be as durable as their oil-based counterparts, advancements in technology have significantly improved the longevity of water-based paints.
Additionally, the finish of the paint plays a vital role in the overall aesthetic and practicality. Common finishes include glossy, semi-gloss, and matte. Glossy finishes are highly reflective, making them easy to clean but can highlight imperfections. Semi-gloss is often favored for kitchen cabinets due to its balance between durability and aesthetic appeal. Matte finishes, while providing a modern, soft look, may not withstand heavy wear as effectively, requiring more maintenance over time.
Color choice is another essential factor. Lighter colors can make a kitchen feel more spacious and bright, while darker hues add depth and sophistication. It is important to consider the existing decor and lighting in the kitchen when choosing a color to ensure cohesion within the space. Ultimately, the selected paint should align with the desired aesthetic, durability, and maintenance commitment, setting the foundation for a successful kitchen cabinet transformation.
Step-by-Step Painting Process
Painting kitchen cabinets can significantly transform your kitchen's appearance, and following a structured process is key to achieving a professional finish. Begin by preparing the workspace and obtaining the necessary supplies, including a high-quality primer, paint, brushes, rollers, and painter’s tape. Ensure proper ventilation and protect surrounding areas with drop cloths.
Start the process with cleaning the cabinets thoroughly to remove grease, dirt, and grime. Once clean, remove the cabinet doors and hardware to create an efficient painting environment. Label the doors and their corresponding locations to make reinstallation easier. The next important step is to apply a primer. Select a primer designed specifically for cabinetry, which enhances adhesion and helps prevent bleed-through. Using a brush or roller, apply a thin, even coat of primer, ensuring to cover all surfaces. Allow it to dry completely, following the manufacturer’s recommended drying time.
Once the primer is dry, prepare to paint the cabinets. It is advisable to use a high-quality paint that is durable and easy to clean. Like the primer, paint should be applied in thin, even coats. This technique reduces the risk of drips and roller marks, leading to a smoother finish. Start by painting the edges and crevices with a brush, then use a roller for larger flat areas. Allow the first coat to dry before examining the finish; typically, two to three thin coats of paint enhance durability and appearance.
After the final coat has dried and cured, it is time to reattach the hardware and cabinet doors. Take care to align everything accurately to maintain a polished look. Following these steps can facilitate achieving a professional-looking finish, turning your kitchen into a space that feels refreshed and inviting.
Finishing Touches and Reassembly
Once the painting process is complete, the next crucial step in updating your kitchen cabinets involves applying finishing touches that will enhance their durability and aesthetic appeal. Start by selecting an appropriate clear coat or sealer, tailored to the type of paint used. Products like polyurethane, polyacrylic, or a protective topcoat are excellent options for ensuring lasting resilience against wear and tear. Apply a thin layer with a high-quality brush or roller, allowing adequate drying time as specified by the manufacturer's instructions. This protective layer not only adds to the visual depth of the cabinets but also guards against moisture, heat, and everyday kitchen splatters.
Once the clear coat has fully cured, focus on the reassembly process. Begin by gathering all previously removed hardware, ensuring that everything is in good condition. This includes hinges, knobs, and handles. Before attaching the hardware, it is beneficial to clean these components thoroughly; using a small brush or cloth to remove any dust or residue will contribute to a polished final look. Next, reattach the cabinet doors, carefully aligning them with the hinges to ensure they hang straight and operate smoothly. It may be helpful to have a second person assist with this process, especially for larger cabinet doors.
After the doors are secured, the final step involves reorganizing your kitchen. Take a moment to assess the cabinet contents, considering how you utilize your kitchen space. Prioritize daily use items at eye level and store less frequently used products higher up or in less accessible areas. This not only maximizes efficiency but also showcases your beautifully painted cabinets. With everything back in its rightful place, your kitchen remodel will be completed, and you will enjoy an enhanced cooking space that reflects your personal style.
Maintenance Tips for Long-Lasting Results
Maintaining the appearance of your newly painted kitchen cabinets is essential for ensuring they remain vibrant and appealing over time. Proper care can prolong the life of your paint job and prevent premature wear and tear. Here are several maintenance strategies that can help keep your cabinets looking fresh and beautiful.
First and foremost, regular cleaning is crucial. Use a soft cloth or sponge with a mild detergent diluted in water to wipe down the surfaces. Avoid harsh chemicals or abrasive materials, as they can scratch or damage the paint. Instead, opt for a gentle cleaner that will effectively remove grease and grime without compromising the finish. Wipe with a dry cloth to prevent water spots and streaks.
It is also important to routinely check for signs of damage, such as chipping or peeling. Conducting periodic inspections will allow you to address issues early, thus preventing further deterioration. If you notice any chips, you can easily perform a touch-up by applying the same paint used originally. For best results, ensure the surface is clean before applying touch-up paint, and use a fine brush for precise application.
Another key aspect of maintenance is managing wear and tear from everyday use. Consider installing cabinet liners or using coasters and mats to protect surfaces from scratches. Additionally, be mindful of how you open and close cabinet doors and drawers, employing a gentle motion to avoid damaging the paint.
Finally, remember that environmental factors can affect the longevity of your cabinet paint. Humidity and temperature fluctuations can contribute to paint wear, so maintaining a stable environment in your kitchen can be beneficial. By following these maintenance tips, you can ensure your painted kitchen cabinets maintain their elegance and charm for years to come.