How to Install Floating Shelves Like a Pro: Tips, Best Practices, and Common Mistakes
5 min read


Understanding Floating Shelves: Benefits and Options
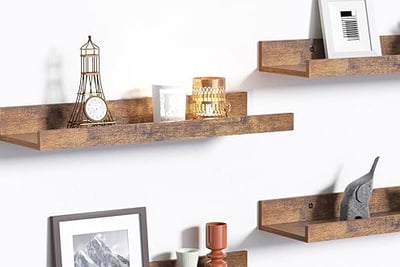
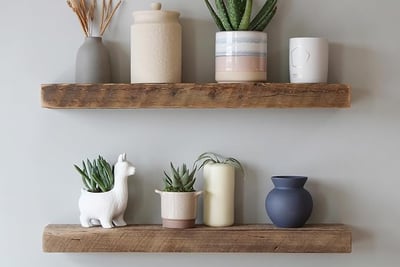
Floating shelves are a popular choice for modern interior design, offering both aesthetic appeal and versatile functionality. They are typically mounted to a wall without visible supports, creating a clean, streamlined look that can be integrated into any room. This minimalist style not only enhances the appearance of a space but also allows for more open floor plans, making rooms feel larger and less cluttered.
In terms of practical benefits, floating shelves provide additional storage without the need for bulky furniture. This feature is particularly advantageous in smaller spaces such as apartments or studios, where maximizing vertical storage is essential. Floating shelves can hold a variety of items, including books, decorative pieces, and essentials, teaching homeowners to utilize their wall space effectively.
When considering floating shelves, various materials and styles are available, catering to diverse aesthetic preferences. Common materials include wood, metal, and glass, each presenting a unique look and durability. For instance, wooden shelves can introduce warmth and texture, while glass shelves may lend a more elegant and modern flair. Metal options can provide an industrial touch, perfect for contemporary designs.
While selecting the right floating shelf, several essential factors should be considered. Weight capacity is paramount; it is crucial to choose a shelf that can adequately support the items intended for display. Additionally, size matters—homeowners must measure the intended space to ensure the shelf fits appropriately without overwhelming the area. Finally, the installation surface should be assessed to guarantee that the shelf can be securely mounted, preventing any potential accidents. By keeping these factors in mind, one can effectively choose floating shelves that not only complement their decor but also meet practical storage needs.
Essential Tools and Materials for Installation
Installing floating shelves requires a selection of essential tools and materials to achieve a professional finish. Preparing your workspace efficiently will streamline the process and minimize errors. Begin by gathering the following tools:
1. **Drill**: A reliable power drill is necessary for creating holes in the wall. Choose a model that is comfortable to handle and offers variable speed settings to accommodate different materials.
2. **Level**: To ensure that your floating shelves are installed perfectly straight, a good quality level is indispensable. You can opt for a traditional bubble level or a digital level for added precision.
3. **Measuring Tape**: Accurate measurements are crucial for proper shelf placement. A measuring tape will help you establish precise distances between shelves and ensure even spacing from the floor or other surfaces.
4. **Stud Finder**: For securing shelves to the wall, it’s important to locate the studs behind the drywall. A stud finder can assist in identifying these structural supports, providing a more stable installation.
5. **Screwdriver**: Depending on the types of screws you will be using, a Phillips or flathead screwdriver will facilitate the installation process, allowing you to tighten or loosen screws as needed.
6. **Brackets and Screws**: Floating shelves typically require specific brackets designed for strength and support. Check the manufacturer’s recommendations to acquire the correct type of brackets and screws suitable for your shelf material.
7. **Sandpaper or a Power Sander**: If your shelves are unfinished wood, smooth the surface with sandpaper to enhance appearance and prevent splinters.
Prepare a clean, well-lit workspace, and lay out all your tools and materials. Having everything on hand will contribute to a more efficient installation process and ensure that your floating shelves look professionally installed.
Step-by-Step Guide to Installing Floating Shelves
Installing floating shelves requires careful planning and execution to ensure they are both functional and aesthetically pleasing. The following steps outline the process in detail:
1. Measurement and Marking: Start by determining the desired height of your floating shelves. Use a tape measure to find the right position, and mark the locations with a pencil. This will help ensure that the shelves are level and even when installed. A laser level can be beneficial for long shelves, as it provides a straight line across the wall.
2. Finding Studs or Using Anchors: Next, identify wall studs using a stud finder. It's essential to attach the shelves to studs for maximum stability. If you cannot find a stud in the desired location, use wall anchors, especially if you're working with drywall. Choose the appropriate type of anchor based on the weight your shelves will support.
3. Installing the Brackets: Based on the marks you made, pre-drill holes into the wall for the brackets. Use a level to ensure the brackets are straight before securing them with screws. When dealing with different wall types, such as concrete or masonry, utilize masonry screws and a concrete drill bit to secure the brackets properly.
4. Placing the Shelves: Once the brackets are firmly in place, carefully slide the floating shelves onto the brackets. Ensure they are snug and level; you may need to make slight adjustments if necessary. Once positioned correctly, check for stability by gently pressing down on the shelves.
5. Final Touches: If you plan to display heavy items, consider placing additional support underneath the shelves. This precaution will enhance their durability. Regularly check the brackets and screws over time to ensure the shelves remain secure.
By following these steps diligently, you can install floating shelves that not only elevate your décor but also provide reliable storage solutions.
Common Mistakes and Troubleshooting Tips
When installing floating shelves, several common mistakes can hinder the overall aesthetic and functionality. One of the most frequent errors involves improper measurements. Before beginning installation, it is crucial to measure the desired height and spacing between shelves accurately. Failing to do so may result in uneven placements, making the shelves impractical. Always use a level to ensure that shelves are aligned correctly; this minor step can significantly impact the final appearance.
Inadequate wall support is another prevalent issue. Floating shelves depend on brackets, which must be securely anchored into the wall’s studs. If installation occurs in areas without studs, the shelves may sag or even fall over time. Utilizing a stud finder can aid in pinpointing these vital supports. If it is not possible to find or use the studs, consider using wall anchors designed for heavy loads to provide additional support. Additionally, the weight capacity of the shelves should be adhered to, as exceeding this limit can lead to structural failure.
Alignment issues during installation can also create significant problems. It is essential to frequently verify that the hardware is level and straight. Use both a level and laser line if necessary. If shelves begin to tilt after installation, check the brackets and make adjustments as needed. Furthermore, unsightly gaps between the wall and shelves can be addressed with trim or paint, although ensuring a snug fit should be the goal during installation.
Encouraging readers to troubleshoot potential problems empowers them to tackle issues independently. Being prepared for anticipated challenges and understanding solutions will enhance the floating shelf installation experience. By acknowledging these common mistakes, individuals can effectively enhance their DIY skills and achieve professional-looking results with their floating shelves.