How to Build a Simple DIY Workbench for Your Garage
5 min read


Introduction to Workbenches
In any garage, a workbench is an essential component that significantly enhances the functionality of the space. It serves as a dedicated surface for performing various tasks, whether it involves woodworking, repairing household items, or completing hobby projects. The practical utility of a workbench cannot be overstated, as it provides a stable area to work on and helps in maintaining an organized environment for tools and materials.
A well-structured workbench is not only about having a flat surface; it plays a crucial role in streamlining the workflow. By having designated areas for tools and workspace, a workbench encourages efficiency and reduces the time spent searching for equipment. This organized approach minimizes distractions, allowing for a more focused and productive working environment. Furthermore, it helps in keeping the garage tidy, ensuring that materials and tools are properly stored and easily accessible.
Building a DIY workbench offers the unique advantage of customization. Each individual has different requirements based on their specific projects and available space. Custom features can include adjustable heights, designated storage for tools, and special compartments for materials. This personalization can enhance comfort and efficiency, catering to individual preferences and making the workbench a genuinely valuable asset. The process of constructing a DIY workbench can also provide a sense of accomplishment and ownership, fostering a deeper connection with the workspace.
Ultimately, investing time and effort into building a personalized workbench can transform a garage into an efficient workshop. By evaluating your needs and planning accordingly, the possibilities for your DIY workbench are nearly limitless, making it an indispensable tool for any home project.
Tools and Materials Needed
Before embarking on the journey of constructing a DIY workbench, it is vital to gather the necessary tools and materials. Having the right equipment not only facilitates the building process but also ensures a safe working environment.
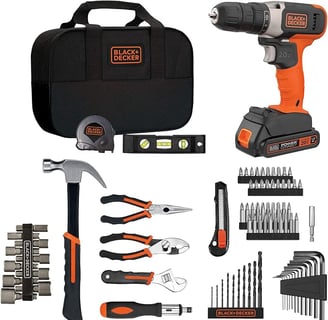
For this project, you will need a combination of hand tools and power tools. Essential hand tools include a measuring tape for accurate dimensions, a square for ensuring right angles, and a level for checking the evenness of your workbench. Saws are crucial; a hand saw can suffice for basic cuts, but using a miter saw will provide more precision and efficiency, especially for angled cuts. Additionally, a drill is necessary for making holes and driving screws, while a screwdriver set will be useful for securing various components.
Among the power tools, a router may also be beneficial for adding decorative edges or hollowing out areas on your workbench. A jigsaw can help with curved cuts, giving you more flexibility with your design. Safety equipment should not be overlooked; protective goggles, gloves, and a dust mask are essential for protecting yourself while actively working with wood and power tools.
Material selection plays a significant role in the durability and functionality of your workbench. Plywood is a popular choice for the top surface due to its strength and resistance to warping. Alternatively, solid hardwood can provide a more robust and elegant surface but may come at a higher cost. For the frame, using 2x4 lumber will give it the necessary support, while screws or bolts will serve as reliable fasteners. Ensure you select wood that is straight and free from defects for optimal performance.
Equipping yourself with these tools and materials will prepare you for a successful DIY workbench project, allowing you to begin with confidence and clarity.
Step-by-Step Building Process
Building a DIY workbench can be an enjoyable and rewarding project, suitable for both novice and seasoned craftsmen. To begin, it is essential to plan your workspace meticulously. Measure the available area in your garage where you intend to place the workbench. Carefully consider the dimensions to ensure that the workbench fits comfortably within the space while allowing for mobility around it. A standard height for a workbench is around 36 inches, but depending on your preference or intended use, you may adjust this measurement accordingly.
Once you have your dimensions, it is time to gather your materials. You will need plywood or hardwood for the surface, 2x4 lumber for the frame, screws, and wood glue for added stability. Next, carefully cut the pieces to size, following the measurements you have taken. A miter saw or circular saw is ideal for this step, ensuring clean and precise cuts, which are crucial for a sturdy workbench.
After you have all the components ready, it is time to assemble the frame. Begin by creating a rectangular frame using the cut pieces of 2x4, securing them with screws and wood glue for enhanced durability. Ensure that everything is square; this will prevent any wobbling in your final product. Once the frame is assembled, you can attach the work surface, placing it on top of the frame and securing it properly.
For added functionality, consider integrating features such as a shelf underneath or tool storage on the side. Visual aids, like diagrams or tutorials available online, can be useful during this process to help clarify any complex steps. By following these instructions methodically, you will create a reliable workbench that enhances your garage workspace.
Pros and Cons of Building Your Own Workbench
Creating a DIY workbench offers several notable advantages that can appeal to both novice and experienced DIY enthusiasts. One significant benefit is customization. Building your own workbench allows you to tailor the dimensions, design, and materials to fit your specific needs and workspace. This personalized approach ensures that the final product meets your requirements, including storage solutions, surface area, and aesthetic preferences.
Another advantage to consider is cost-effectiveness. Generally, constructing a workbench can be more affordable than purchasing a pre-built one, especially if you utilize reclaimed wood or surplus materials already at your disposal. Additionally, the process of building a workbench yourself can lead to economic savings, as you can closely control the expenses associated with materials and tools, rather than opting for higher-priced commercial options.
Furthermore, crafting a workbench can impart a sense of accomplishment and satisfaction. The act of building something with your own hands can foster a deeper connection to your workspace and enhance your confidence in DIY projects. For many, this emotional investment is a valuable part of the process that transcends the mere functionality of the finished product.
However, there are also some drawbacks to consider when weighing the decision to build a DIY workbench. Firstly, constructing a workbench requires a significant time commitment, which may not be feasible for everyone. Between planning, gathering materials, and the actual construction, the process can be lengthy.
Additionally, a certain level of skill is necessary; those with limited woodworking experience may find the task daunting. If you lack the foundational skills, the risk of making mistakes during the build can lead to frustration and wasted materials.
Finally, some individuals might not have access to the specialized tools needed for construction, increasing the potential costs and complexity of the project. Ultimately, weighing these pros and cons will aid in determining whether the endeavor of building a DIY workbench aligns with your goals and resources.