How to Build a DIY Shoe Rack or Mudroom Bench
8 min read


Introduction to DIY Shoe Racks and Mudroom Benches
In contemporary home design, shoe racks and mudroom benches serve as essential elements that contribute significantly to maintaining an organized and clutter-free entryway. These functional pieces not only provide a designated space for footwear but also enhance the overall aesthetics of the home, reflecting personal style and taste. The practice of creating DIY shoe racks or mudroom benches allows homeowners to adapt these installations to their specific needs, making them not just practical but also unique.
Particularly in areas with high foot traffic, an efficient shoe rack ensures that shoes do not accumulate haphazardly at the entrance, which can lead to an untidy living space. Likewise, mudroom benches play a crucial role by providing a comfortable seating area for removing or putting on shoes, as well as extra storage for bags and outdoor gear. By opting for a DIY approach, individuals can personalize dimensions, materials, and design elements, ensuring that the resulting construction fits seamlessly into any entryway, regardless of its size or style.
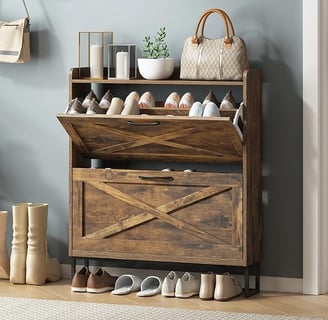
The materials commonly employed for building DIY shoe racks and mudroom benches range from wood to metal, fabric, or repurposed items, offering myriad options for customization. For instance, reclaimed wood provides a rustic charm, while sleek metal structures may cater to more contemporary tastes. Moreover, building one's own furniture can be cost-effective and fulfilling, as it allows for creative expression while also fostering a sense of accomplishment. Ultimately, constructing a DIY shoe rack or mudroom bench can greatly improve the functionality and visual appeal of the entryway, making it an inviting and organized space.
Tools and Materials Needed
Building a DIY shoe rack or mudroom bench requires both essential tools and materials, organized for ease of understanding. This section outlines what you will need to successfully complete your project.
Essential Tools: The first category includes tools necessary for construction. A circular saw is vital for cutting wood to size; however, a handsaw can also suffice for simpler projects. A drill is essential for making precise holes and attaching wood pieces with screws. A tape measure will help ensure accurate measurements, while a square ensures that cuts are straight, resulting in a professional-looking finish. Additionally, a level is important for confirming that your shoe rack or bench sits evenly.
Other useful tools include a sander or sanding block to smooth surfaces, protective gear such as safety goggles, and a workbench or sawhorses for stability during assembly. A driver bit set is useful for inserting screws securely.
Materials: For the structure of your shoe rack or bench, select wood that suits your desired aesthetics and budget. Softwoods like pine are often economical, while hardwoods like oak or maple offer durability. Plywood is an excellent alternative for robust shelving units. Depending on the finish you prefer, wood stain or paint can enhance the project’s visual appeal and protect the surface. Remember to choose materials that align with your sustainability goals, such as reclaimed wood or eco-friendly paint options.
Optional accessories may include organizing bins, hooks for coats and bags, or cushions for added comfort. To source these materials, visit local hardware stores, home improvement centers, or reputable online retailers. Always consider budget-friendly options that meet your quality standards to ensure a successful and fulfilling build.
Planning Your Design
When embarking on a DIY shoe rack or mudroom bench project, the first step lies in meticulous planning and design. This planning process begins with accurately measuring the available space where the shoe rack or bench will be located. Understanding the dimensions of the space will ensure that the final product fits seamlessly into your home, leaving no awkward gaps or clutter. Begin by taking careful measurements of the height, width, and depth of the area, and consider any obstructions such as doors, windows, or existing furniture that may affect placement.
Next, assess your storage needs. Consider the number of shoes or items you aim to store, as this will dictate the size and number of shelves in the design. If your family has a substantial shoe collection or if you expect to use the rack for other items, including sports gear or bags, it’s essential to factor in additional space for these items. Additionally, evaluating whether you require extra features like hooks for coats or bags can enhance the functionality of your design.
The choice of style is also a crucial aspect to consider. Selecting a design that complements your home decor will ensure that the shoe rack or bench integrates well into your existing aesthetic. You may opt for a more modern look with clean lines and minimalistic features or a rustic appearance using reclaimed wood for a cozy appeal. To assist in visualizing your options, consider utilizing user-friendly design tools and templates available online. These resources can provide valuable inspiration and help you optimize the space while aligning with your personal taste. By planning effectively, you will create a shoe rack or mudroom bench that is both functional and visually appealing.
Step-by-Step Construction Guide
Building a DIY shoe rack or mudroom bench can be an enjoyable and rewarding experience. By following this comprehensive step-by-step guide, you will gain the confidence to create a functional piece of furniture that meets your needs. To begin, ensure you have gathered all the necessary materials, including wooden boards, screws, wood glue, and finish of your choice. It is also essential to have safety equipment, such as goggles and gloves, to protect yourself during the construction process.
Start by measuring and cutting your wood according to your design specifications. Typically, you will require components for the top, bottom, and sides of the shoe rack or bench. Utilize a miter saw for precise cuts, and always double-check your measurements to avoid any mistakes. Once cut, sand all edges to eliminate splinters and ensure a smooth finish.
Next, assemble the mainframe by attaching the sides to the top and bottom pieces. It is advisable to use wood glue along with screws for added stability. Ensure everything is squared up before tightening the screws completely. If you encounter any alignment issues, use clamps to hold the framework in place while adjusting.
After completing the mainframe, add shelves or additional seating surfaces as per your chosen design. Measure where each shelf will be placed and secure them using brackets or additional screws. If you are integrating any cubby sections, ensure they are adequately sized to accommodate boots, shoes, or other items you plan to store.
Lastly, finish your shoe rack or mudroom bench as desired. You may choose to stain, paint, or leave the wood in its natural state. Allow sufficient drying time before using your new creation. Should you experience any challenges or require adjustments during construction, do not hesitate to revisit previous steps or seek additional resources for troubleshooting tips. Following this guide will lead you to a successful DIY project that enhances your home’s organization.
Finishing Touches: Painting and Staining
Once the construction of your DIY shoe rack or mudroom bench is complete, the finishing touches play a crucial role in both aesthetics and longevity. Proper painting, staining, and sealing can transform a plain piece of furniture into a beautiful addition to your space while ensuring its durability against wear and tear.
When considering paint or stain, select a color that complements your existing decor or introduces a pop of color to the area. For a shoe rack, durable finishes such as high-quality acrylic paints or water-resistant wood stains are advisable due to their resistance to moisture and stains. Keep in mind that light colors may show stains more easily, while darker shades can hide imperfections but may require more frequent touch-ups. Additionally, consider the finish; satin or semi-gloss finishes offer a nice balance of aesthetic appeal and easier cleaning.
Applying paint or stain requires some preparation to achieve a professional finish. Begin by sanding the surface of the wood to create a smooth base for the finish. This step is crucial as it allows for better adhesion of the paint or stain. After sanding, ensure proper ventilation in your workspace. This not only enhances your comfort but also reduces the risk of inhaling fumes from the finishes being applied. Wearing a mask and gloves can further protect you from any harmful chemicals.
To apply your chosen finish, use brushes, rollers, or cloths, depending on the product. Multiple thin coats will yield better results than one thick coat, so be prepared to apply several layers, allowing adequate drying time in between. After completing the finishing process, seal the surface with a clear topcoat to add an extra layer of protection against scratches and moisture. This finishing touch will not only enhance the appearance of your shoe rack or bench but also extend its lifespan significantly.
Installation and Placement Tips
When installing a DIY shoe rack or mudroom bench, careful consideration of placement can significantly enhance both functionality and aesthetics. The entryway is the primary area designated for such installations, as it serves as the transition between the outdoors and indoors. Choosing an optimal location near the entrance allows for easy accessibility to shoes and outerwear, helping to maintain an organized space. Ideally, the shoe rack should be situated on a flat surface, away from direct sunlight or moisture, which can damage materials over time.
When it comes to spacing, it is essential to leave enough room for movement. Ensure there is at least 24 inches of clear space in front of the shoe rack or bench to facilitate easy access. As for height, a typical mudroom bench is best installed at a height of approximately 18 inches so that it remains comfortable for sitting while tying shoes or changing jackets. If you choose to install shelves above, ensure they are within reach, as this will assist in neat organization without creating clutter.
Using mounting techniques is crucial for stability, particularly if the shoe rack is tall or holds a substantial amount of weight. Anchors should be used if you are securing the shoe rack or bench to the wall. For added safety, particularly in homes with children or pets, choose sturdy materials and hardware that can support the weight of the items you intend to store. Additionally, accessorizing the area around the shoe rack or mudroom bench can greatly improve functionality. Consider adding decorative baskets for loose items, cushions for extra comfort on the bench, or hooks for hanging bags and jackets. An organized space not only looks appealing but also maximizes the practicality of a DIY shoe rack or mudroom bench.
Maintenance and Care
To ensure the longevity of your DIY shoe rack or mudroom bench, consistent maintenance and care are paramount. The materials used in your project will influence your cleaning methods, so it is essential to take a tailored approach. For wooden structures, regular dusting with a soft cloth will help prevent the accumulation of dirt and grime. Occasionally, a gentle cleaning solution—such as a mix of mild soap and warm water—can be utilized to wipe down surfaces. It is important to avoid harsh chemicals that may damage the finish or integrity of the wood.
Protecting your shoe rack from wear and tear is also crucial. Consider applying a wood sealant or varnish to enhance durability and shield against moisture damage, particularly in mudroom environments where humidity can be high. For environments with foot traffic, placing a mat underneath the shoe rack can further prevent direct contact with dirt and mud, thereby reducing cleaning frequency.
Periodic upkeep is essential for maintaining functionality and aesthetic appeal. Regularly check for loose screws or hinges and reinforce them as necessary. This simple maintenance task can prevent larger issues over time, ensuring that your piece remains sturdy. Additionally, evaluate your storage needs periodically. As your household changes, so too might your requirements for the shoe rack or mudroom bench. You may find that implementing additional shelves, hooks, or bins can enhance organization and usability. Embrace the flexibility of your DIY project, making adjustments to accommodate new shoes, seasonal items, or changing family dynamics.
In conclusion, with routine maintenance and thoughtful adjustments, your DIY shoe rack or mudroom bench can serve you well for years to come. The integration of effective care methods will preserve the functionality and appearance of this storage solution.