Creating a Beautiful Raised Paver Walkway for Your Garden
5 min read


Introduction to Raised Paver Walkways
Raised paver walkways have emerged as an innovative solution for enhancing both the functionality and aesthetic appeal of garden landscapes. These structures serve a dual purpose; not only do they provide a defined path for footsteps, but they integrate visually pleasing elements that can complement most garden styles. The concept of utilizing pavers, which are typically made from stone, concrete, or brick, affords a plethora of design possibilities, allowing homeowners to express their personal style while maintaining practicality.
One of the primary advantages of raised paver walkways is their ability to improve drainage. Elevated walkways allow water to flow around and beneath them, preventing pooling and reducing the risk of soil erosion. This functionality is particularly crucial in gardens where the soil may be susceptible to heavy rain or other environmental factors that can lead to erosion. By channeling water effectively, raised walkways help sustain a healthy garden environment.
In addition to improving drainage, raised walkways contribute significantly to the visual appeal of a garden landscape. They create a clear boundary between different areas of the garden, guiding visitors through various sections and adding structure to the overall design. When pavers in complementary colors or textures are selected, they can enhance the existing flora and fauna, drawing attention to specific elements of the garden.
Before embarking on the construction of a raised paver walkway, careful planning is essential. Homeowners must consider factors such as the layout, the materials to be used, and the design of the walkway in relation to the garden’s overall theme. By taking these considerations into account, one can ensure that the installation process is efficient and results in a stunning, functional feature that elevates the garden’s design.
Planning Your Walkway Design
Designing a raised paver walkway involves several critical steps that ensure both functionality and aesthetic appeal. Initially, it is essential to measure the intended area accurately. This measurement should take into account not only the dimensions of the walkway but also adjacent garden features such as flower beds, trees, and shrubs. By doing so, you can avoid creating a crowded look while allowing for future growth of plants.
Once measurements are established, the next step is to choose a design that complements your existing garden layout. Consider the overall style of your garden—whether it is modern, traditional, or perhaps cottage-themed. A cohesive design will ensure the walkway enhances the beauty of the surroundings. For instance, if your garden features curved elements, a winding path could add a sense of whimsy, while straight lines might suit a more structured garden.
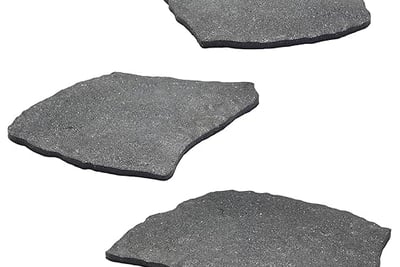
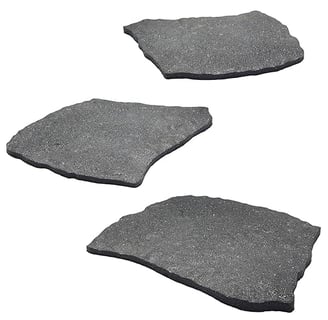
When selecting pavers, it is vital to consider both aesthetics and practicality. Options include concrete, brick, or natural stone, each offering a unique texture and color. Additionally, it is important to think about the base materials that will support the pavers, such as gravel or sand, which provide adequate drainage and stability. These materials are crucial for the longevity of the walkway, as they help prevent shifting and settling over time.
Moreover, layout considerations should reflect both function and beauty. If the walkway is intended for heavy foot traffic, ensure it is wide enough to accommodate multiple users. Creating small seating areas or integrating lighting along the pathway can enhance both safety and ambiance. Ensuring the walkway seamlessly integrates with the surrounding garden elements will create a visually stunning and practical outdoor space.
Step-by-Step Installation Process
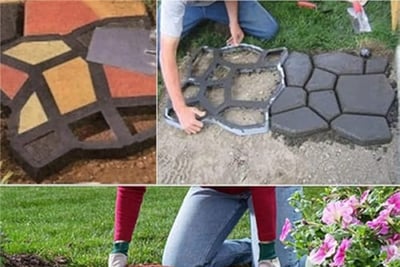
Creating a raised paver walkway involves a systematic approach that can enhance the aesthetics and functionality of your garden. Begin by gathering essential tools: a shovel, a tamper, a level, a rubber mallet, and a broom, alongside the chosen pavers. It's also prudent to have safety gear, such as gloves and safety glasses, to protect yourself during the installation process.
Once you have your tools ready, the next step is to prepare the groundwork. Choose the area for the walkway and mark its outline using stakes and string. Dig out the marked area to a depth of about 6 to 8 inches to remove any sod and debris. Ensure that the base is compacted for stability. A properly compacted base helps prevent shifting or settling, which can lead to a misaligned walkway.
The next phase is laying the base. Fill the dug area with a layer of crushed gravel or sand, approximately 4 inches deep. Use the tamper to compress the material firmly, achieving a flat and even surface. It is critical to have this base level to support the pavers effectively. For added drainage, ensure the base has a slight slope away from any adjacent structures or plants.
Now, it's time to install the pavers. Begin from one end of the walkway, laying the pavers in the desired pattern. Use the level to check for evenness continually as you place each paver. For consistent spacing, utilize spacers or place them manually, ensuring an aesthetically pleasing finish. Once all pavers are in place, lightly tap them with the rubber mallet for secure seating.
To secure the edges, add more sand or gravel around the pavers and press them down. Sweep away excess material, and remember to periodically check for alignment throughout the process. In case of any installation problems, refer back to your base preparation steps, as inadequate foundation often leads to common complications. Following these guidelines will result in a beautiful and durable raised paver walkway.
Maintenance and Enhancements
To ensure the longevity and aesthetic appeal of your raised paver walkway, regular maintenance is essential. One of the primary facets of upkeep involves cleaning techniques that help prevent the buildup of dirt, weeds, and debris. A simple solution of warm soapy water combined with a soft broom can be highly effective for routine cleaning. For stubborn stains, consider using a pressure washer at a low setting to avoid damaging the pavers, taking care not to disturb the joints. It is also wise to inspect the paver surface periodically for any signs of cracking or shifting, as early detection can prevent more extensive repairs later.
Seasonal upkeep is vital for maintaining the integrity of your paver walkway. In the spring, clear any leftover winter debris, and apply an appropriate weed prevention solution to deter growth. During fall, ensure that leaves are promptly cleared to prevent staining or mold formation. Additionally, periodic re-sealing of the pavers helps protect them from moisture damage and UV fading. This process also enhances the color and texture of your pavers, contributing to a refreshed look.
In terms of enhancements, there are numerous options that can significantly elevate the charm and functionality of your walkway. Installing subtle lighting along the edges not only ensures safety during nighttime but also creates an inviting atmosphere. Incorporating planting borders with vibrant flowers or greenery alongside the walkway can bring life and color, harmonizing the pathway with the broader garden design. Decorative elements such as carved stones or mosaic designs can further personalizing your walkway, providing unique touches that reflect your style. These enhancements not only contribute to the visual appeal of your raised paver walkway but also encourage an environment that you, your family, and your guests can enjoy consistently.