Building a DIY Pergola: A Step-by-Step Guide
8 min read


Introduction to Pergolas
A pergola is an outdoor garden feature that consists of a framework covered with trained or climbing plants. Traditionally, it is characterized by a series of vertical posts or pillars that support cross-beams and an open lattice, allowing for the partial admission of sunlight while providing shelter and aesthetic interest. Pergolas serve a variety of purposes in outdoor spaces, making them a valuable addition to any garden or backyard.
One of the primary benefits of a pergola is its ability to offer shade. While it does not provide complete protection from the elements, the structure allows for reduced sun exposure and creates a more comfortable atmosphere for outdoor activities. This makes it an ideal spot for relaxation, reading, dining, or entertaining guests during warm, sunny days. Additionally, the open design encourages airflow, contributing to a pleasant outdoor experience.
Moreover, pergolas enhance the aesthetic appeal of gardens and patios. Available in various designs—ranging from traditional to modern—these structures can be customized to complement existing architectural features of your home. A well-designed pergola can serve as a focal point in your landscape, drawing attention and admiration. The materials used in building a pergola—such as wood, metal, or vinyl—farther allows for versatility, enabling homeowners to select options that meet their tastes and budget.
In addition to shade and aesthetic benefits, pergolas define spaces within larger outdoor areas. They can create distinct zones for dining, lounging, or gardening, effectively organizing spacious backyards. As such, they offer both functional and visual interest, making them a favored choice among homeowners seeking to elevate their outdoor living experience.
Planning Your Pergola Project
Embarking on a DIY pergola project necessitates careful planning to ensure a successful outcome. The first step in this planning process involves assessing potential locations on your property. Ideally, a pergola should be placed in an area that receives adequate sunlight while also considering the desired level of shade and privacy. Identify areas that may benefit from added structure or where outdoor entertaining could thrive.
Once a location has been selected, precise measurements are crucial. Use a measuring tape to evaluate the dimensions of the space where the pergola will be constructed. Document any obstacles such as existing trees, pathways, or buildings that may affect the design and layout. Consider the dimensions of the pergola itself; too large or too small a structure can disrupt the balance of your outdoor space and affect functionality.
The design style of your pergola is another significant aspect to consider during the planning phase. Common styles include traditional, modern, or rustic, and your choice may be influenced by the existing architectural features of your home and garden. Sketching your ideas can facilitate clearer visualization, allowing you to play with dimensions and aesthetics before committing to a final design.
Moreover, it is imperative to familiarize yourself with local building codes and regulations. Many jurisdictions require permits or have specific guidelines regarding outdoor structures. Engaging with your municipality early in the project will prevent any legal complications later on. Check for zoning restrictions, and if necessary, consult with a professional to ensure compliance. Planning effectively not only streamlines the construction process of your DIY pergola but also enhances its overall appeal and functionality in your outdoor space.
Choosing the Right Materials
When embarking on the journey of constructing a DIY pergola, the choice of materials plays a critical role in its durability, maintenance, and overall aesthetic appeal. The three most commonly used materials for building a pergola are wood, vinyl, and metal, each offering distinct advantages and disadvantages that must be carefully considered.
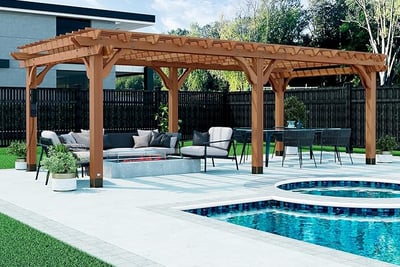
Wood is a traditional choice for pergolas, celebrated for its natural beauty and versatility. Popular species such as cedar and redwood are naturally resistant to decay and insects, making them strong contenders for outdoor structures. However, wood requires regular maintenance, such as staining or sealing, to ensure longevity. With exposure to the elements, it can warp or crack over time, especially in regions with extreme weather conditions. The initial cost of wood can vary widely based on type and quality, making it an essential factor for budget-conscious builders.
Vinyl is another option, appealing for its low maintenance requirements and durability. Unlike wood, vinyl does not require regular painting or staining and is resistant to rot and insects. It also offers a range of colors and styles, allowing for customization based on personal taste. However, vinyl can be less aesthetically pleasing to some individuals who prefer the natural look of wood. Additionally, it may be less sturdy compared to metal structures and can become discolored under prolonged sunlight exposure.
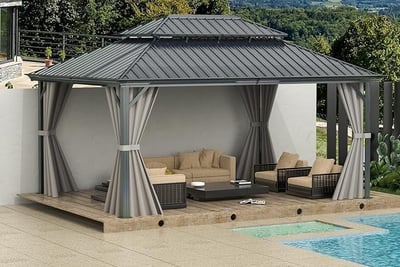
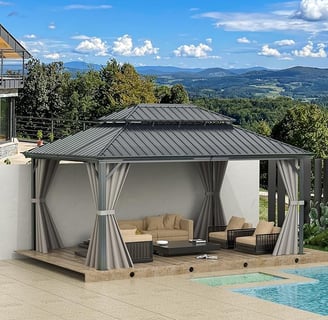
Metal pergolas, typically constructed from aluminum or steel, are gaining popularity for their strength and modern appearance. They can withstand harsh weather conditions and require minimal upkeep, making them suitable for various climates. However, metal can absorb heat, creating an uncomfortable space underneath during sunny days. It may also come at a higher cost than wood or vinyl, depending on the design and materials used.
The decision on which material to use should take into account personal style preferences as well as climate conditions. For example, in a humid environment, selecting rot-resistant wood or vinyl could be advantageous, while those in drier climates may find metal appealing for its endurance. Ultimately, prioritizing the strengths and weaknesses of each material will lead to an informed choice, resulting in a stunning and functional DIY pergola.
Tools and Equipment Needed
Building a DIY pergola requires a variety of tools and equipment to ensure the project is completed efficiently and safely. The essential tools can be categorized into hand tools, power tools, and safety gear. Each of these plays a crucial role in the construction process.
Hand tools are fundamental for tasks such as measuring, cutting, and assembling components of the pergola. Necessary hand tools include a tape measure, carpenter's square, and a level for ensuring precision. A circular saw or hand saw will be required for cutting lumber, while a hammer and a set of screwdrivers are vital for fastening elements together. For more intricate work, a chisel can assist with shaping wood as needed.
Power tools significantly enhance the efficiency of your project. A power drill is indispensable for creating holes and driving screws, while a miter saw helps achieve clean, angled cuts. A nail gun can expedite the assembly process by rapidly securing pieces together with minimal manual labor. If you encounter any particularly stubborn wood, a jigsaw may prove helpful for making curved cuts.
Equally important is the safety gear that protects you during construction. This includes safety glasses to shield your eyes from debris, gloves to protect your hands from splinters, and ear protection against loud power tools. A hard hat should also be worn if working in areas where there is a risk of falling objects.
The tools and equipment required to build a pergola may be available for purchase, but renting equipment can be a more economical option, particularly for tools that will not be used frequently. Consider checking local hardware stores or equipment rental companies to find what you need.
By ensuring you have the right tools and safety gear before beginning your pergola project, you will set the stage for a successful and enjoyable DIY experience.
Step-by-Step Construction Process
Building a DIY pergola requires careful planning and execution, beginning with site preparation. Start by selecting the appropriate location in your yard, ensuring it is level and receives adequate sunlight. Clear away any debris and vegetation, then mark the perimeter of your pergola using stakes and string. This initial step is crucial, as it will provide a clear guide for the subsequent construction phases.
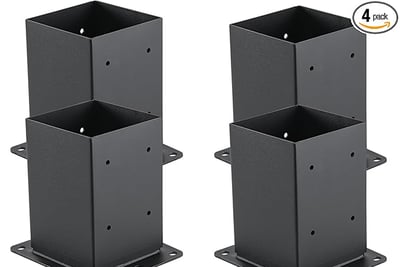
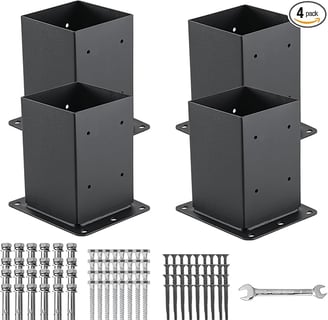
Next, it is time to build the base of the pergola. Using concrete, set your post anchors at the corners of the marked area, ensuring they are evenly spaced and level. Allow the concrete to cure as per the manufacturer's recommendations. Once ready, you can begin constructing the posts that will form the vertical support structure. Cut the posts to your desired height and secure them into the anchors. It is advisable to use a level to ensure all posts are perfectly vertical, as this will affect both the integrity and aesthetic of the structure.
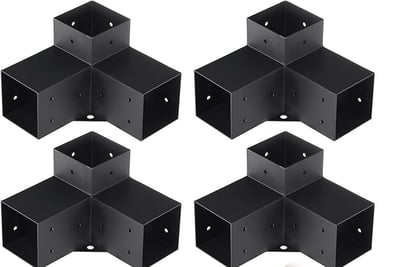
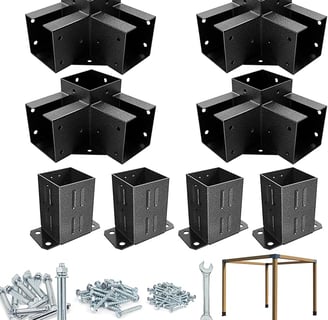
With the posts in place, the next step is adding the cross beams. These will provide stability and character to your pergola. Cut your chosen lumber to the appropriate lengths and attach them horizontally across the tops of the posts, securing them with brackets or screws. Following this, the lattice can be installed. This component adds charm while also offering partial shade. Cut the lattice panels to size and secure them in between the cross beams using appropriate fasteners.
Finally, you will want to focus on the finishing touches of your DIY pergola. This stage may involve sanding rough edges and applying a coat of stain or paint to enhance durability and appearance. Select a finish that complements your backyard aesthetic and offers protection against the elements. Allow sufficient time for the finish to dry before using your new outdoor structure.
Customizing Your Pergola
When it comes to enhancing the functionality and aesthetics of your pergola, customization plays a vital role. Personalizing your structure allows it to reflect your unique style, seamlessly integrate with your outdoor space, and serve the specific needs of your household. Several options exist for you to consider when customizing your pergola, ensuring it not only becomes a beautiful feature in your garden but also a practical addition.
One of the most popular enhancements is the inclusion of built-in seating. Adding benches or seating nooks along the sides of your pergola creates a comfortable space for relaxation or gatherings with family and friends. Such seating can be designed to complement the overall look of the pergola and can be crafted from various materials that match the rest of your outdoor furniture.
Integrating climbing plants is another excellent way to personalize your structure. Vines such as wisteria, clematis, or climbing roses can provide shade and add a touch of natural beauty to your pergola. By planning for support structures and selecting the right plants, you can create a lush, green retreat that's inviting and serene. Additionally, hanging planters or flower boxes can introduce pops of color and further enhance the overall landscape.
Lighting options are essential for extending the usability of your pergola into the evening hours. Installing string lights, lanterns, or recessed lighting can create a warm ambiance and transform your outdoor area into a cozy gathering spot. Each lighting option can be tailored to fit the desired atmosphere, whether casual or festive.
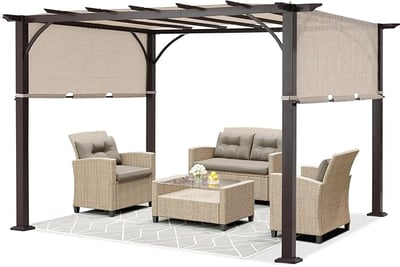
Lastly, consider adding fabric canopies or drapes to provide extra shade and protection from the elements. These elements not only offer functionality but can also introduce color, texture, and comfort to your pergola. With so many customization options at your disposal, your pergola can be transformed into a unique and inviting extension of your home.
Maintenance and Care Tips
Maintaining a DIY pergola is essential for ensuring its durability and aesthetic appeal over time. Regular maintenance tasks not only help preserve the structure but also enhance the longevity of the materials used in construction. One of the primary maintenance tasks is cleaning the pergola periodically. It is advisable to use a mild soap solution and a soft brush to remove debris, dirt, and mildew, which can accumulate over time. This cleaning process should ideally be done at least twice a year, particularly during the spring and fall seasons when leaves and various debris are more likely to gather.
In addition to cleaning, inspecting the pergola for damages is crucial. Homeowners should check for signs of rot, especially in wooden structures, as moisture can lead to decay. Look for any signs of wood-boring insects as well. If any damage is identified, prompt repairs should be undertaken. This may involve replacing any rotting beams or applying wood preservatives to affected areas. Additionally, it's beneficial to ensure that the base of the pergola is dry and not in contact with standing water, which can lead to deterioration.
Applying protective coatings or sealants is another vital step in maintaining the longevity of the pergola. For wooden structures, a high-quality sealant or wood stain can protect against UV rays, rain, and other environmental factors that may damage the wood over time. Reapplying these protective measures should be done annually for optimal results. For metal pergolas, checking for rust and applying rust-inhibiting paint as needed will ensure that the structure remains visually appealing and intact. By following these maintenance tips, homeowners can enjoy their beautiful pergolas for years to come, providing both function and aesthetic value to their outdoor spaces.